Overview
This document will instruct you on configuring and managing your CW Manage integration.
If you use Automate, setup the Automate integration first and import your customers from there. Importing customers from Manage generally results in many unnecessary Tenants being created in ImmyBot. You can link Automate to Manage to leverage the existing mappings between Automate<->Manage instead of manually mapping your Manage customers
Prerequisites
An active ImmyBot subscription or trial
MSP Admin permissions to your ImmyBot Tenant
Admin permissions to your CW Manage instance
Capabilities
Setting up this integration allows you to
- Deploy Software to machines covered by a certain agreement type
- Example: Deploy Huntress to all customers with a Managed Security Agreement
- (Preferred) Deploy Software to machines covered by an Agreement with a specific Addition
- Example: Deploy SentinelOne to all computers that have SentinelOne as an Addition on their agreement
Process
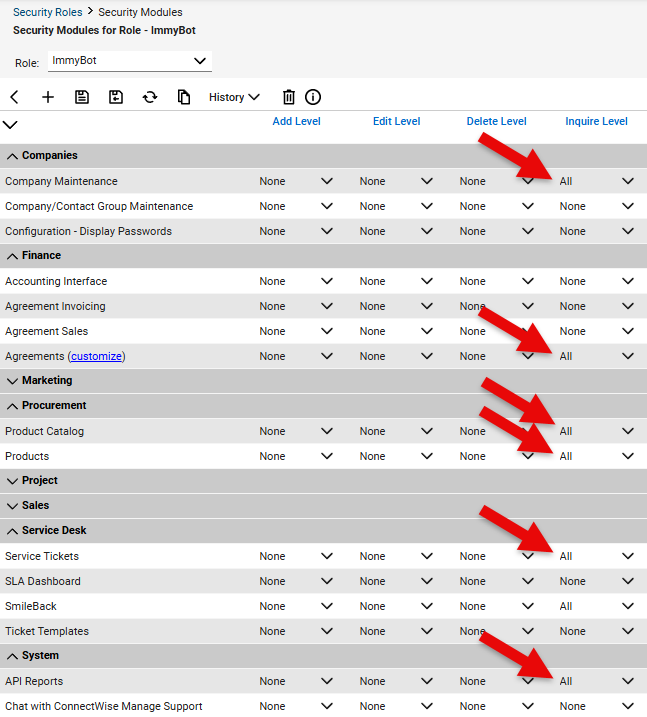
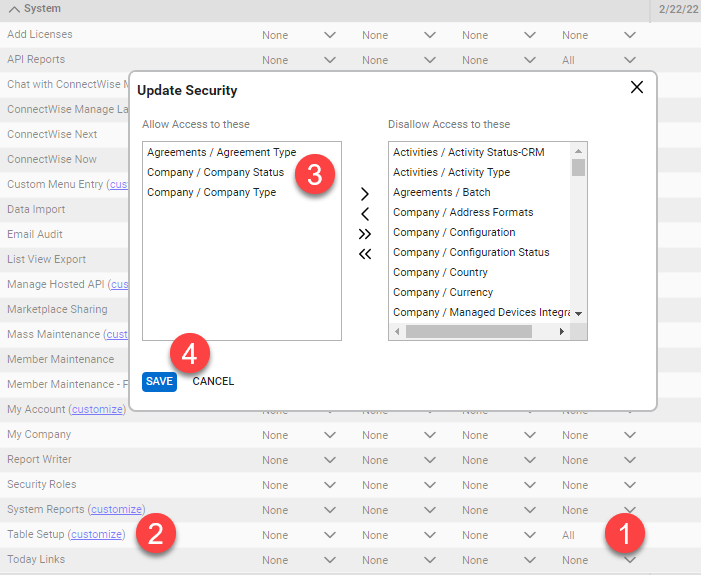
Create an ImmyBot Role with the following permissions
- Company -> Company Maintenance -> Inquire Level (All)
- Finance -> Agreements -> Inquire Level (All)
- Procurement -> Product Catalog -> Inquire Level (All)
- Procurement -> Product -> Inquire Level (All)
- Service Desk -> Service Tickets -> Inquire -> (All) : Optional – Required for the technician tools feature
- System -> API Reports -> Inquire Level (All)
Create an API Member
Go to System -> Members and create a new API Member
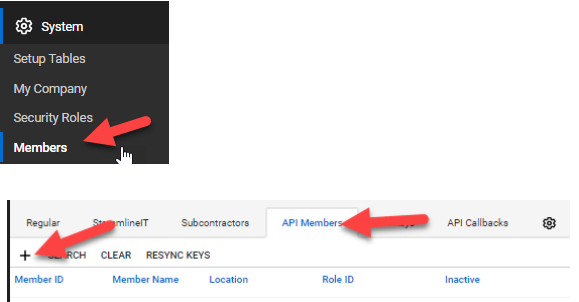
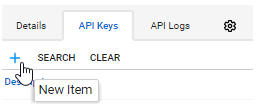
Create a new API key
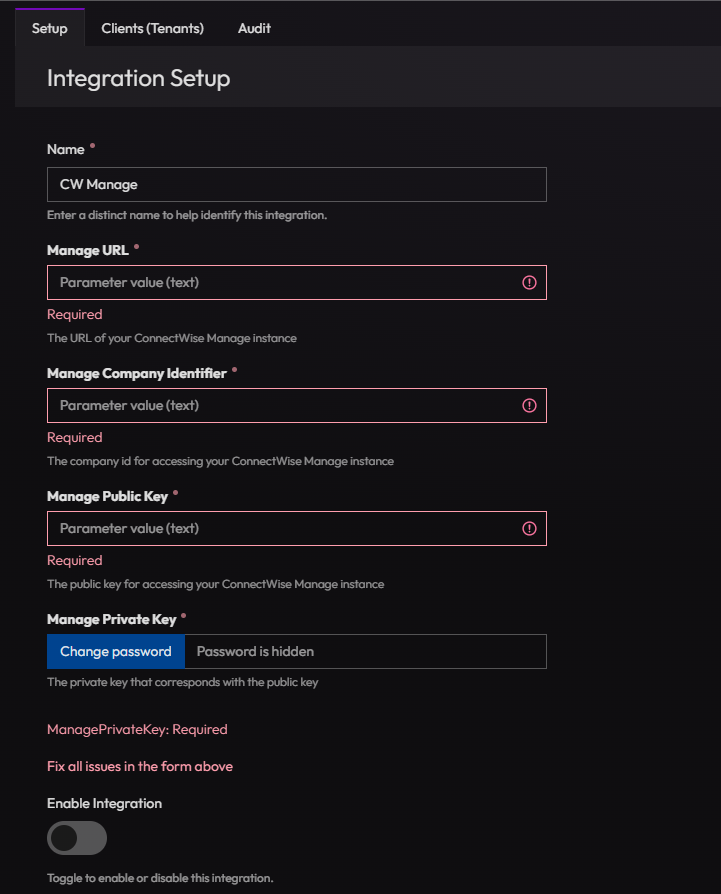
Configure the integration in ImmyBot
- Navigate to Show More > Integrations
- Click on
Add Integration - Select
CW Manage - Fill out your Manage URL and Company ID
- Provide the Public Key and Private Key that were previously generated in Manage
- Update the integration
- Enable the integration
- Navigate to the Clients tab and map your CW Manage clients to ImmyBot tenants
CW Manage Pods
Only one CW Manage pod for ImmyBot will load at a time.
CW Manage Pod v1
Setting up this integration allows you to Look up the contact’s email address in Immy and shows you their computers (Immy does User Computer Affinity behind the scenes so you don’t have to do it manually). Technicians can jump into their computers or push software via the ticket.
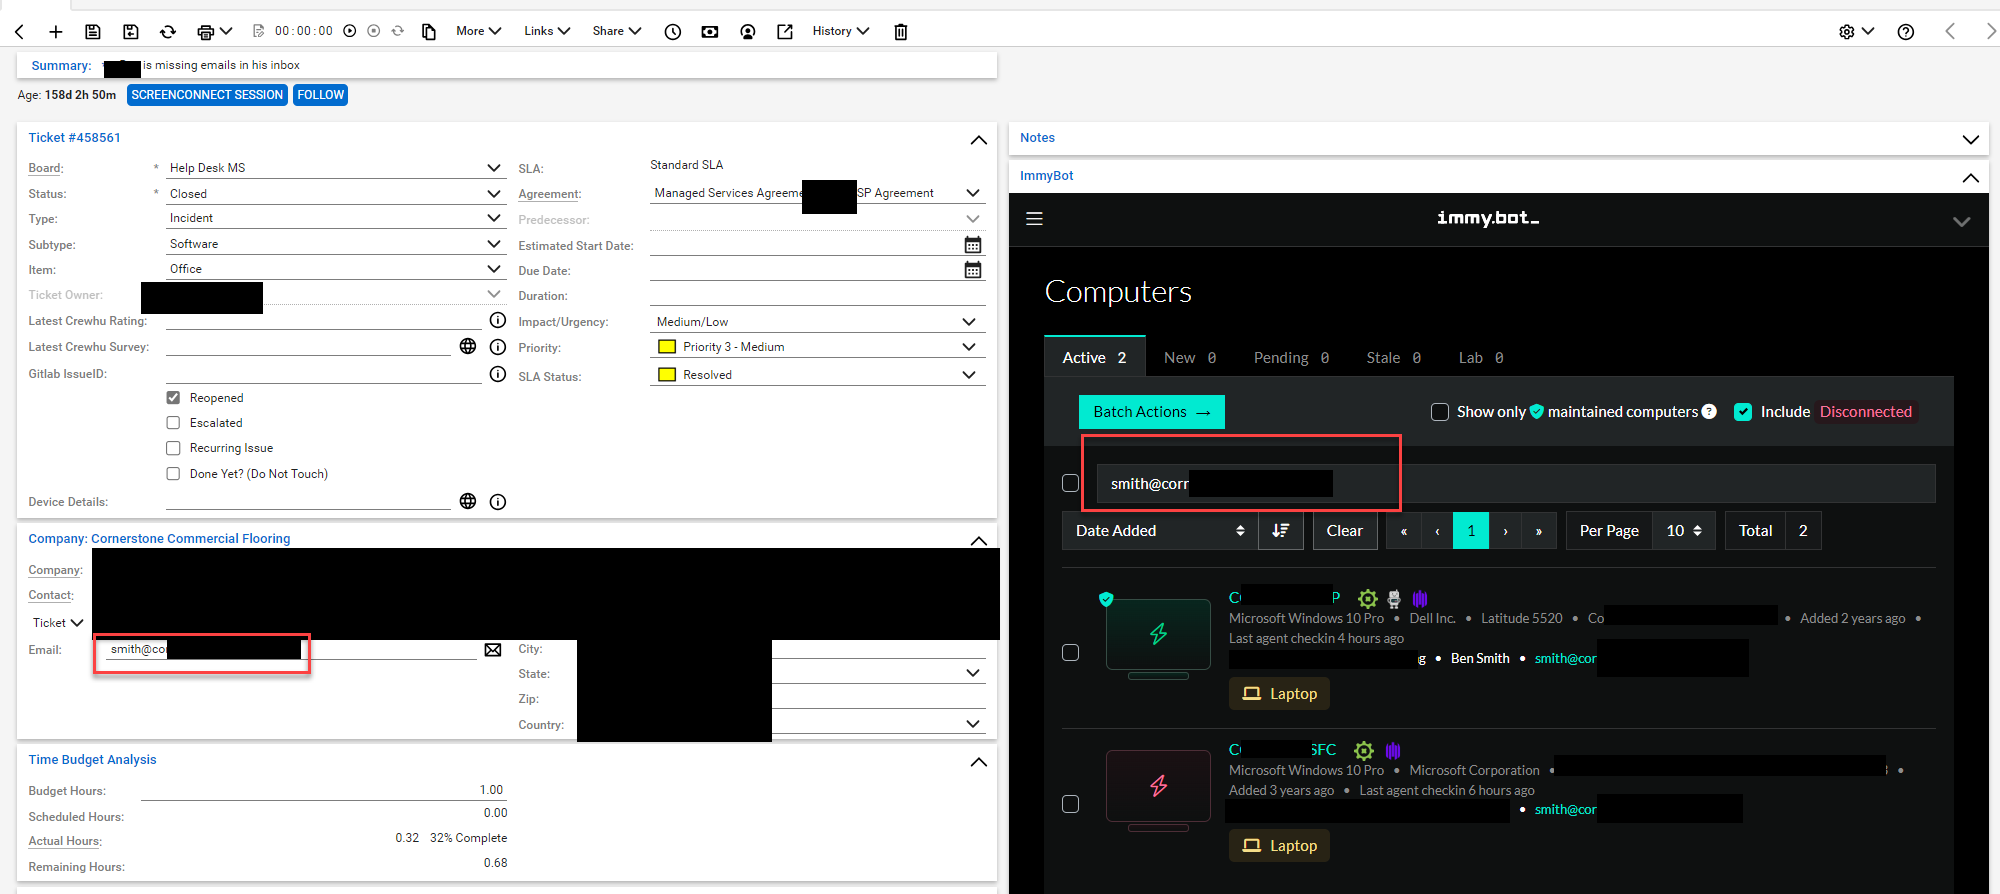
- Go to Show More -> Integrations
- Add CW Manage Pod
- Go to ConnectWise -> Setup Tables -> Manage Hosted API
- Set a description, such as
ImmyBot - Set Screen to
Service Ticket - Set Origin to your ImmyBot URL. ex:
https://<YOURIMMYBOTSUBDOMAIN>.immy.bot - Set URL to the following:
https://<YOURIMMYBOTSUBDOMAIN>.immy.bot/plugins/api/v1/<YOURCWMANAGEPODID>/immypod - Replace
<YOURIMMYBOTSUBDOMAIN>with your ImmyBot subdomain. - Replace
<YOURCWMANAGEPODID>with the integration ID of your CW Manage Pod integration which can be found in the URL when editing the CW Manage Pod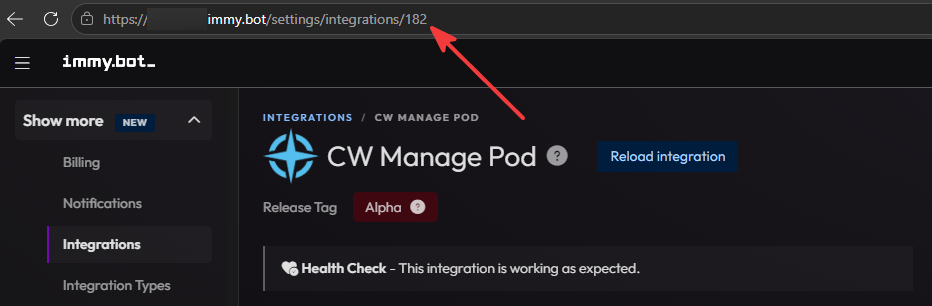
Technician Tools
*This feature only works for the Service Ticket screen.
Required Permissions
Modify your immy.bot security role to include Service Desk -> Service Tickets -> Inquire Level -> All

Setup
In ConnectWise Manage, you can use "Manage Hosted API Setup" to embed content on certain pages in the UI. You can set one up by navigating to System -> Setup Tables -> Manage Hosted API Setup
Copy the url template:
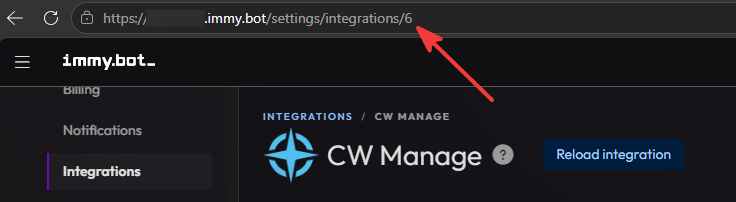
https://<your-domain>.immy.bot/technician-pod/cw-manage/<cw-manage-integration-id>
The URL is specific to your instance. You’ll need to replace <your-domain> with your domain and <cw-manage-integration-id> with your CW Manage integration id. This id can be found here:
After you setup the pod, navigate to a ticket, and it shoud load the technician tools pod for immy.bot.