Overview
ImmyBot’s RBAC system provides granular permission management, allowing you to control exactly what users can access and modify within your environment. This system has been designed with a phased approach to ensure seamless migration from legacy permissions while introducing powerful new capabilities.
Roles
A role grants one or more capabilities. There are 100+ capabilities to choose from. Some examples are ‘Manage Software’ and ‘Manage Billing’.
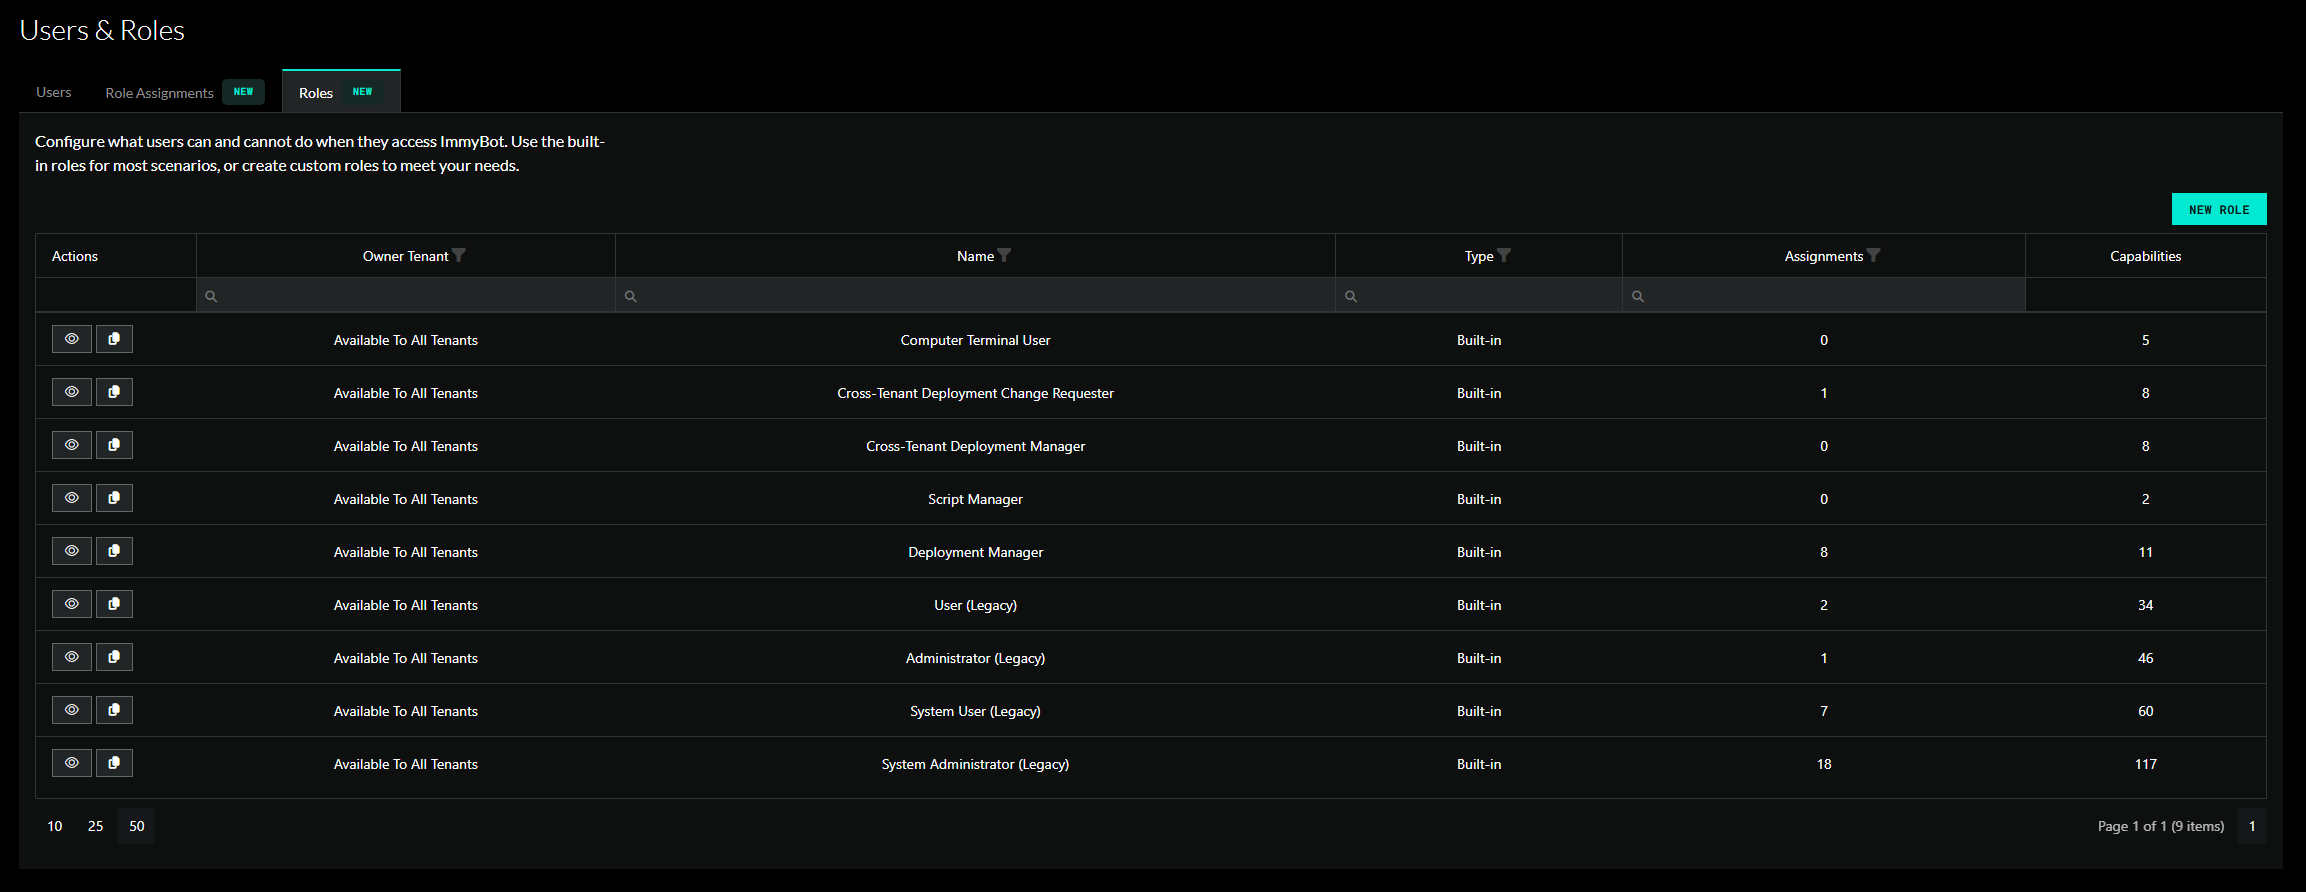
Built-In Roles
In an effort to provide a seamless transition for existing customers, four built-in legacy roles have been added that mirror existing permission structures:
| Role | Description | Legacy User Type |
|---|---|---|
| System Administrator (Legacy) | Grants every permission available | MSP Admin |
| System User (Legacy) | Same as system admin but with a few restrictions | MSP Non-Admin |
| Administrator (Legacy) | Broad access with no system permissions | Tenant Admin |
| User (Legacy) | Limited access | Tenant Non-Admin |
Additional built-in roles have been added to maintain compatibility with existing user settings and application preferences.
| Role | Description | Legacy preference |
|---|---|---|
| Script Manager | Permission to manage scripts | Used in favor of the ‘Allow Non-Admins and Non-MSP Users to Use Terminal and Edit Scripts’ application preference |
| Computer Terminal User | Grants access to run scripts against a computer in the terminal tab | Used in favor of the ‘Allow Non-Admins and Non-MSP Users to Use Terminal and Edit Scripts’ application preference |
| Deployment Manager | Permission to manage deployments | Used in favor of the ‘Allow Non-Admin Users to Manage Deployments’ application preference |
| Cross-Tenant Deployment Manager | Permission to manage cross-tenant deployments | Used in favor of the user checkox ‘Can Manage Cross Tenant Deployments’. |
| Cross-Tenant Deployment Change Requester | Permission to manage cross-tenant deployments through change requests | Used in favor of the the ‘Require Change Requests for Non-Admin Cross-Tenant Deployments’ application preference. |
Built-in roles are inherently available to all tenants. However, in order to assign a role that contains system permissions, a user must be granted the Assign Cross-Tenant Roles permission. Built-in roles are read-only and the permissions they grant cannot be modified.
Custom Roles

You are encouraged to create your own custom roles to suite your needs.
If you have the Manage Public Roles permission, then you can create a role that any user in the system can see.
Otherwise, a role is owned by a specific tenant. A user can only see public roles or roles that are managed by a tenant they have permission to manage roles for.
Role Capabilities
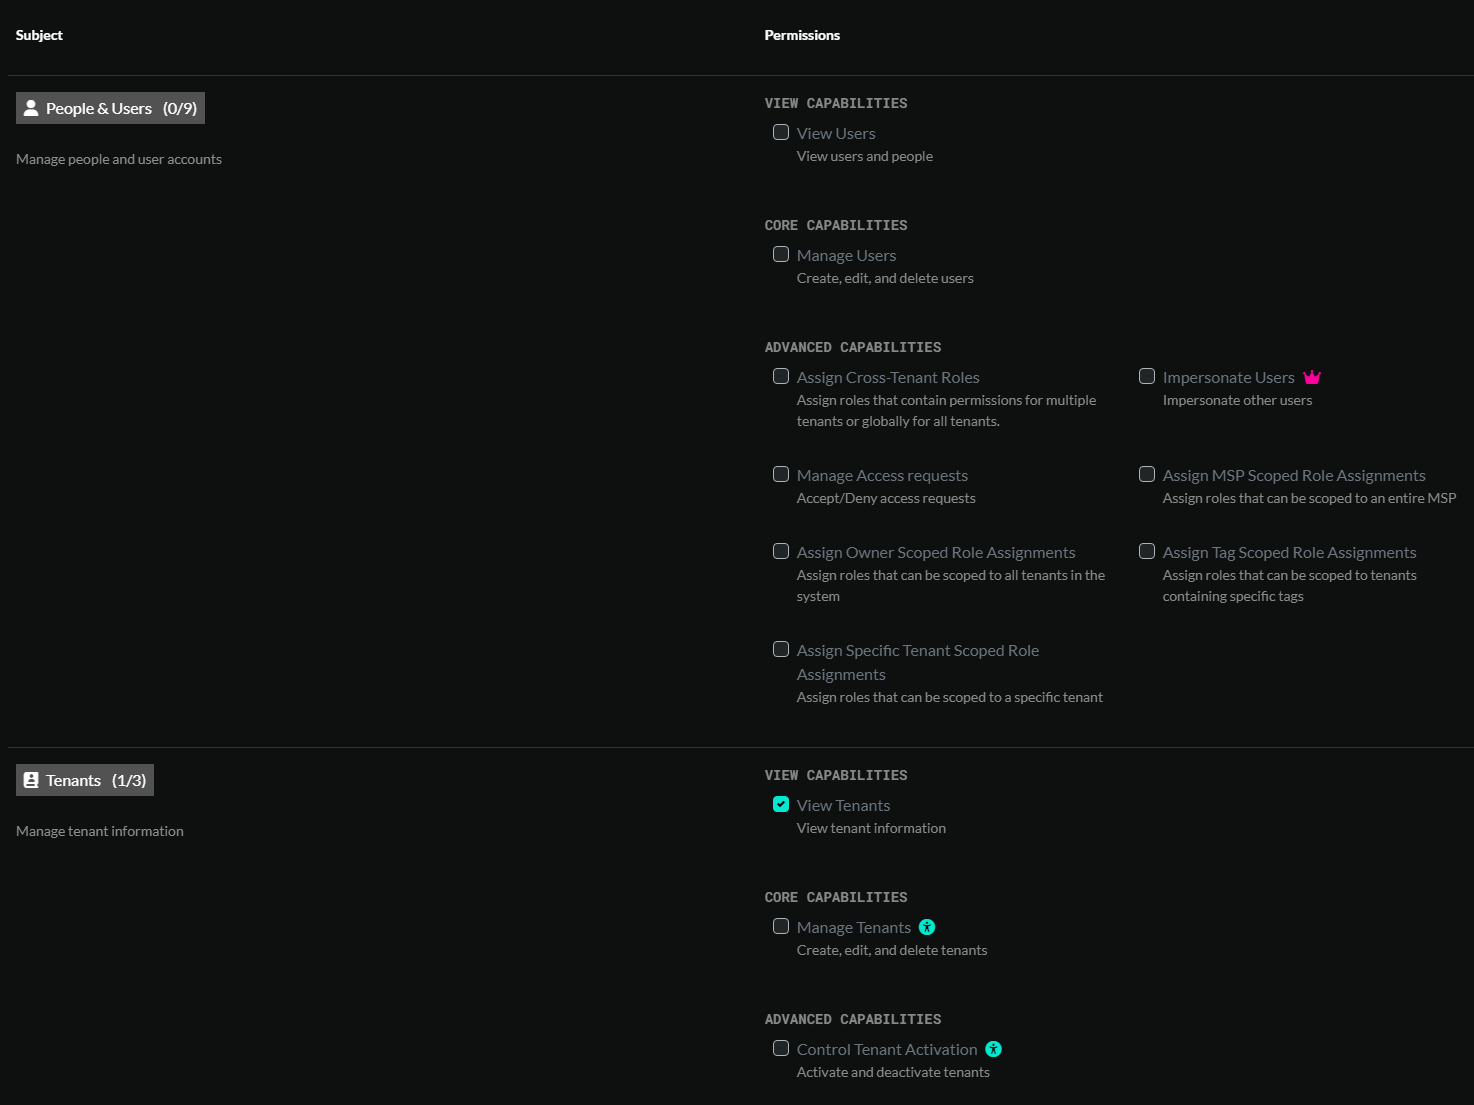
There are 100+ different permissions that can be granted for a given role.
System permissions
Many permissions can be scoped to a particular set of tenants or resources through role assignments. Other permissions, such as ‘Manage Billing’ are denoted as system permissions and cannot be limited to certain tenants. System permissions are traditionally reserved for MSP users and should be carefully considered when granted to non-MSP users.
Groups
A group is a collection of users that share the same permission requirements. Since, managing permissions for individual users can be very tedious, we encourage the adoption of groups.
A group can be granted one or more role assignments.
Members of a group inherit all role assignments assigned to the group.
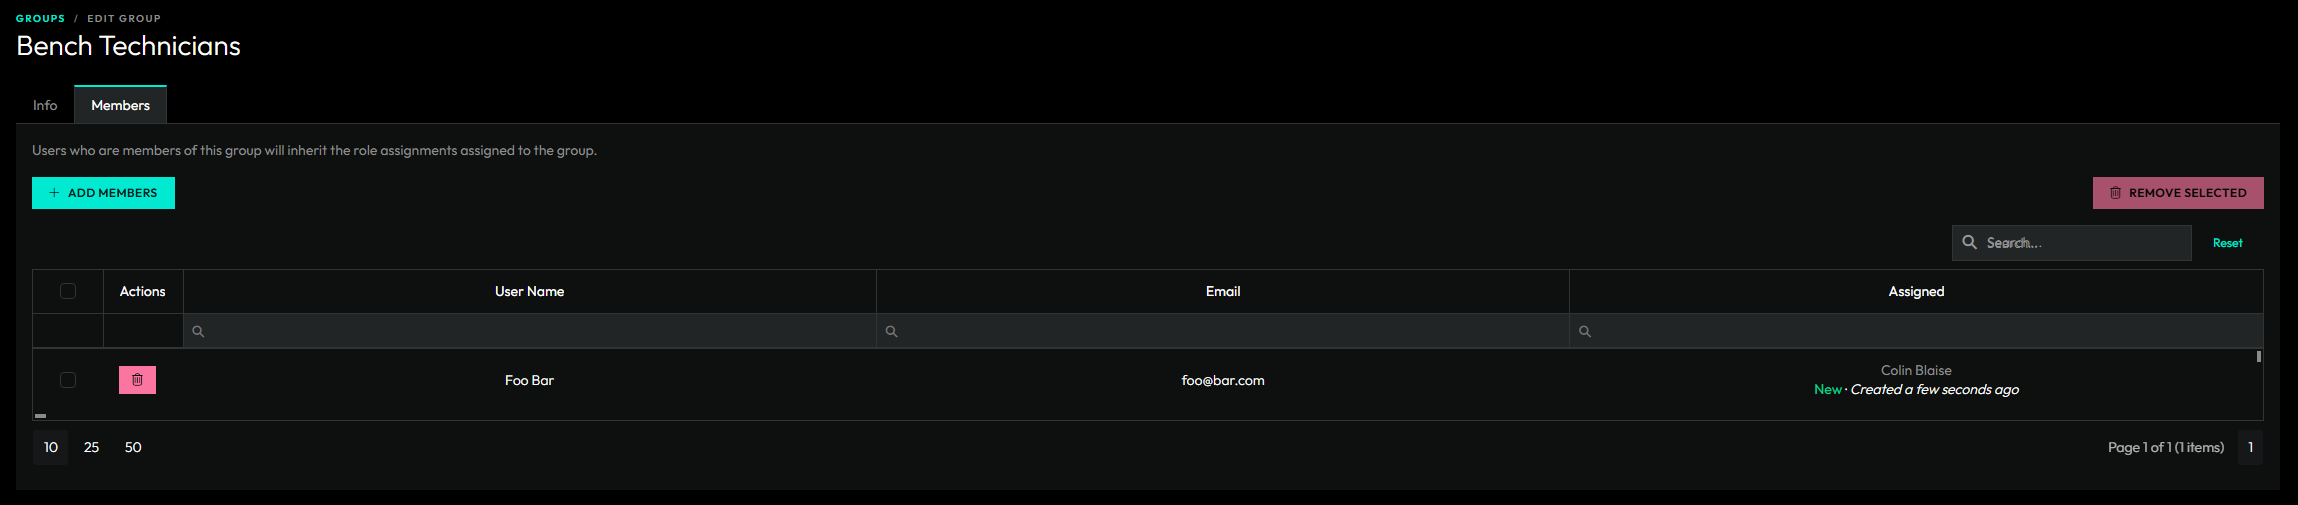
If a group is owned by a specific tenant, then only users that belong to that tenant can be added to the group.
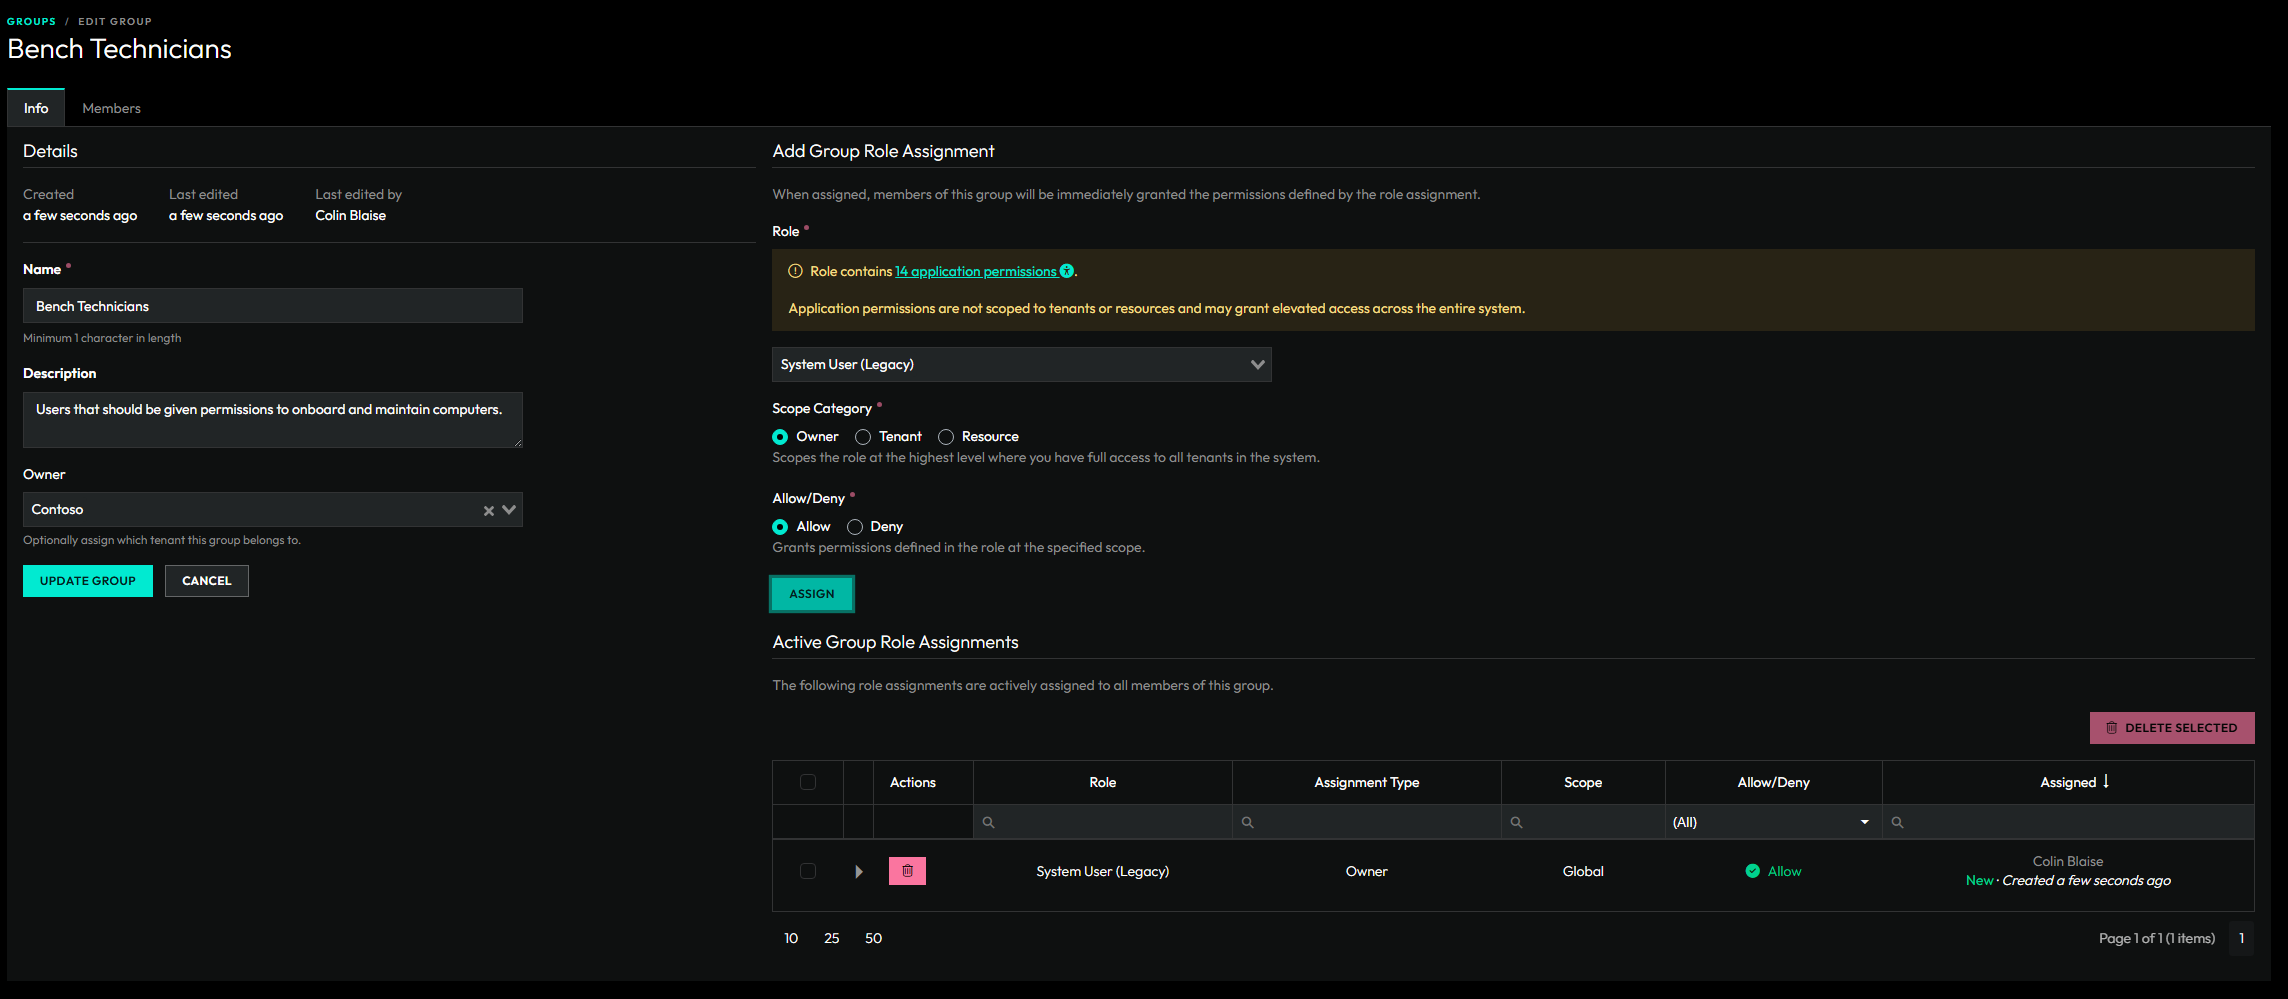
Role Assignments
Permissions are granted or denied to users through Role Assignments. Role assignments can be assigned to Groups or directly to users.
An assignment contains a selected role, a selected scope, and an “Allow” or “Deny” value. Users can have multiple role assignments where they are allowed the cumulative allowed permissions from allow role assignments. Denied role assignments take precedence when determining if a user has access to a particular permission or resource.
Role Assignment Scopes
| Scope | Description |
|---|---|
| Owner | Scopes the role at the highest level where you have full access to all tenants in the system. |
| MSP | Scopes the role to the MSP tenant and all tenants that belong to the MSP. |
| Specific Tenant | Scopes the role to the selected tenant. |
| Tenant Tag | Scopes the role to all tenants with the selected tag. |
| User’s Tenant | Scopes the role only to the tenant of the selected user. Useful for giving your customers access to their own tenant. |
| Resource | Grants the role at the selected resource scope. The only resource type supported for now is Computers. |
Users
A user is a person who has been granted access to ImmyBot.
Creating a user
- Access Requests – Users can request access and will show up on the main Users & Roles page.
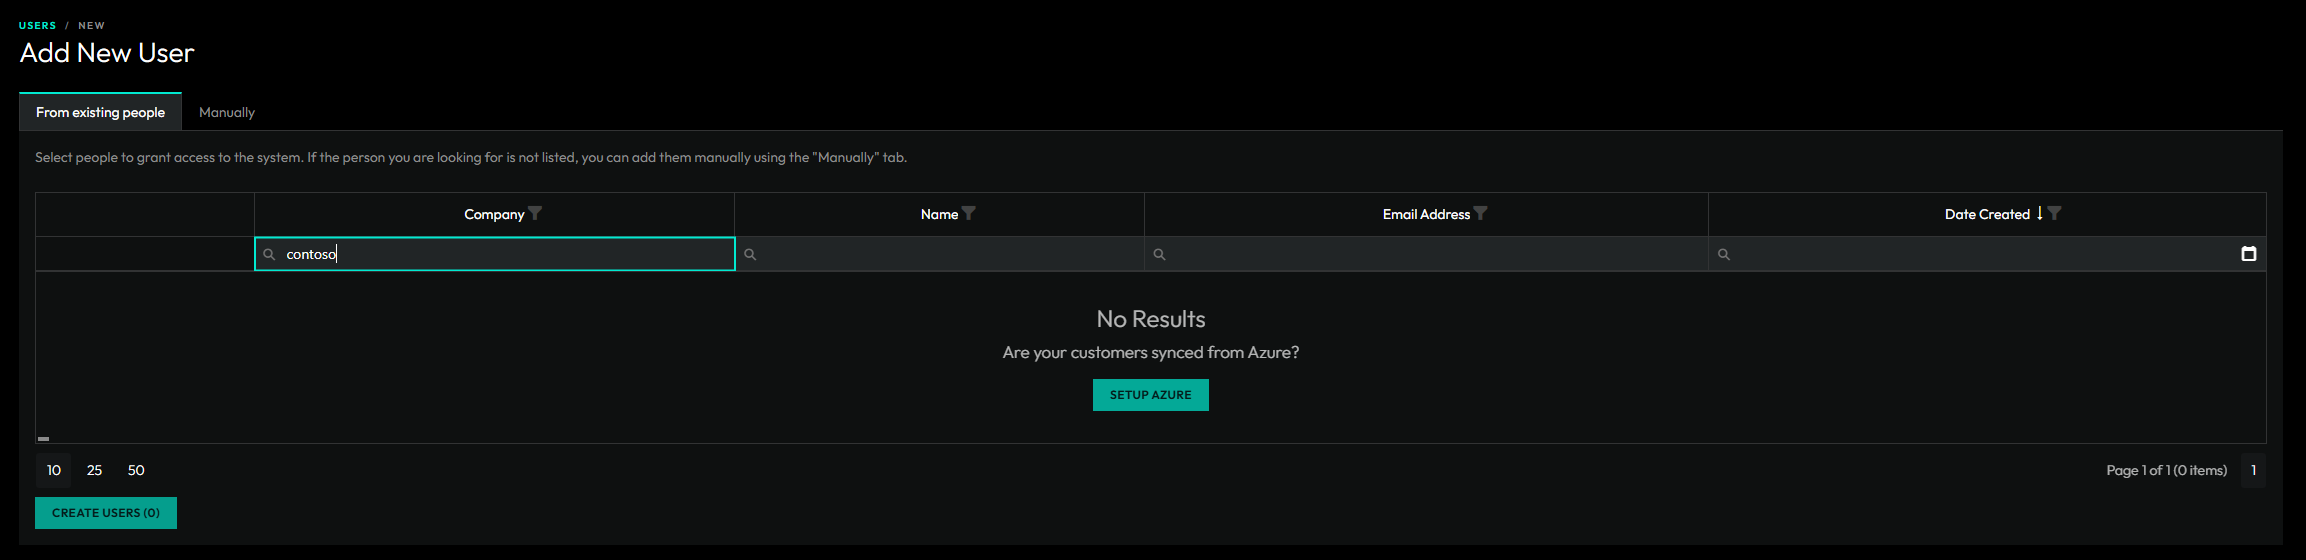
- From Existing People – Existing people can be promoted to a user. If you can’t find a specific person, you may need to link their azure customer to a tenant in ImmyBot.
- Manually – You can always manually create a user if you know their Azure Object ID.
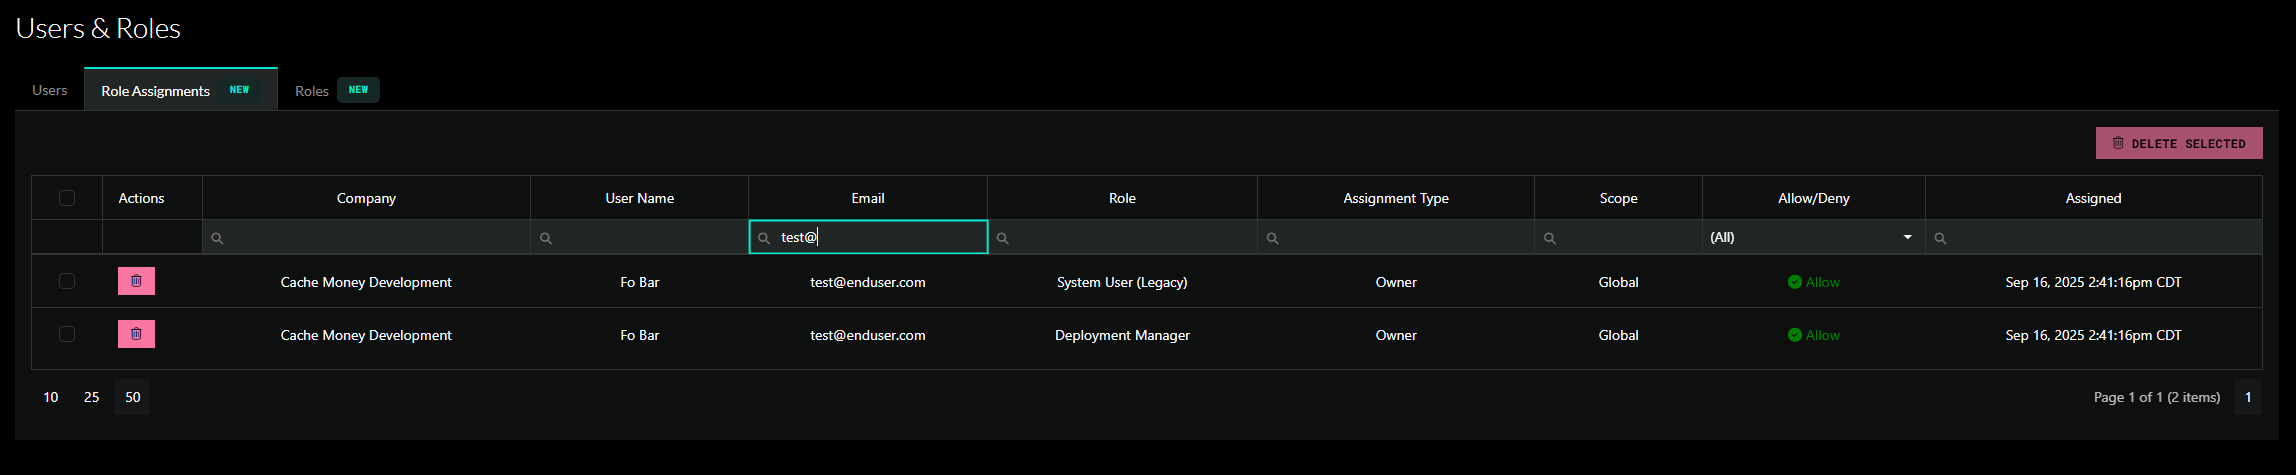
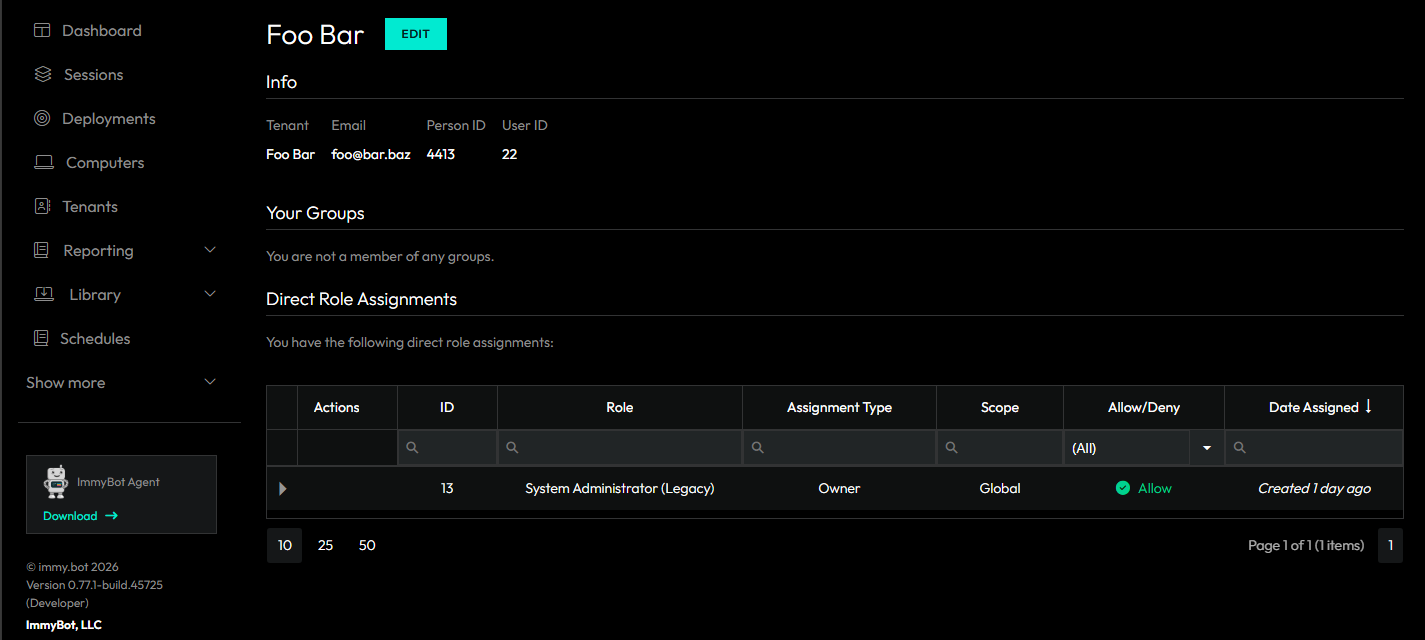
View all direct role assignments
On the main Users & Roles page, we have a tab to view all direct role assignments. For existing customers, you will see that all of your users have been migrated over to direct role assignments. Consider replacing these direct role assignments with groups to better organize your users.
My User’s Group and Role Assignments
You can now view your own user’s group and role assignments on the profile page. The profile page can be accessed at /profile or by clicking the profile link in your account dropdown located in the top-right of the page.
Profile
A profile page has been added at /profile where you can easily view your own permissions.
Object Authorization
Scripts, Software, Tasks, Tags, and Media have authorization sections.
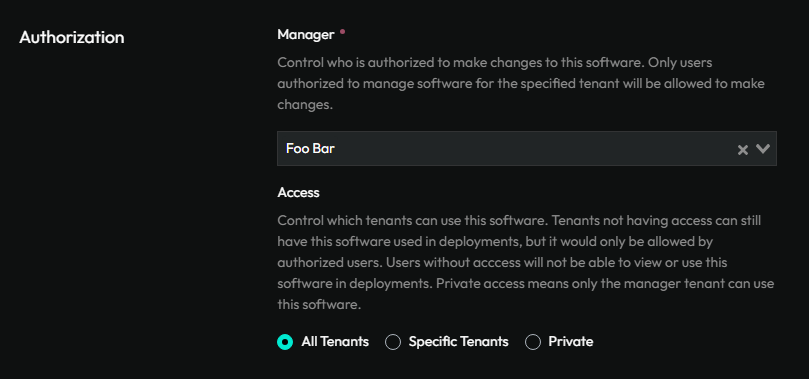
A user’s permissions under RBAC will be taken into account when determining whether a user is allowed to view or manage one of these objects.
Caveats and Considerations
One main thing to consider is that in order to manage features such as sessions and computers, you must be able to view that specific feature, and possibly other features. For example lets say you want a tech to manage sessions, computers and deployments. They will need to be granted Allow access for View permissions on Sessions, Computers, Deployments, Scripts, Software, Tasks and Tenants, as well as Manage Sessions and Manage Computers. We don’t enforce this when you’re creating roles because you could create a role with “Manage Tenant” and apply that as a deny against a single tenant in the event that you need to prevent a specific user from accessing a specific tenant.
Standard Use Cases
Preventing access to specific tenants
Use this process to prevent access to a specific tenant. For example, if you don’t want your regular helpdesk technicians to have access to the MSP tenant(s). This role will be able to view and manage Tenants, Deployments and Computers. You can add or remove permission sets as you see fit. For the sake of least privilege, we recommend keeping instance preferences, such as Azure and integration management, out of this role.
We will be working from Show More -> Users & Roles
Click on the Roles tab, and click New Role
- Fill out the Name and Description. For this document, we are going to call this role “Manage Tenants, Computers and Deployments”
- Do not select an owner for the role.
- Give this role all permissions under Computer, Deployments, and Tenants.
- Click Create Role at the bottom of the page
From here you will need to assign this role to your user(s). Click on Users tab.
- For all users you want to be able to manage both MSP and regular tenants:
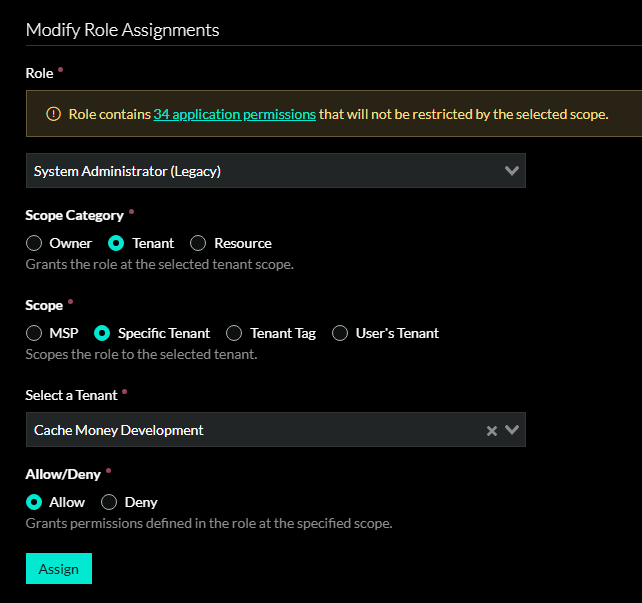
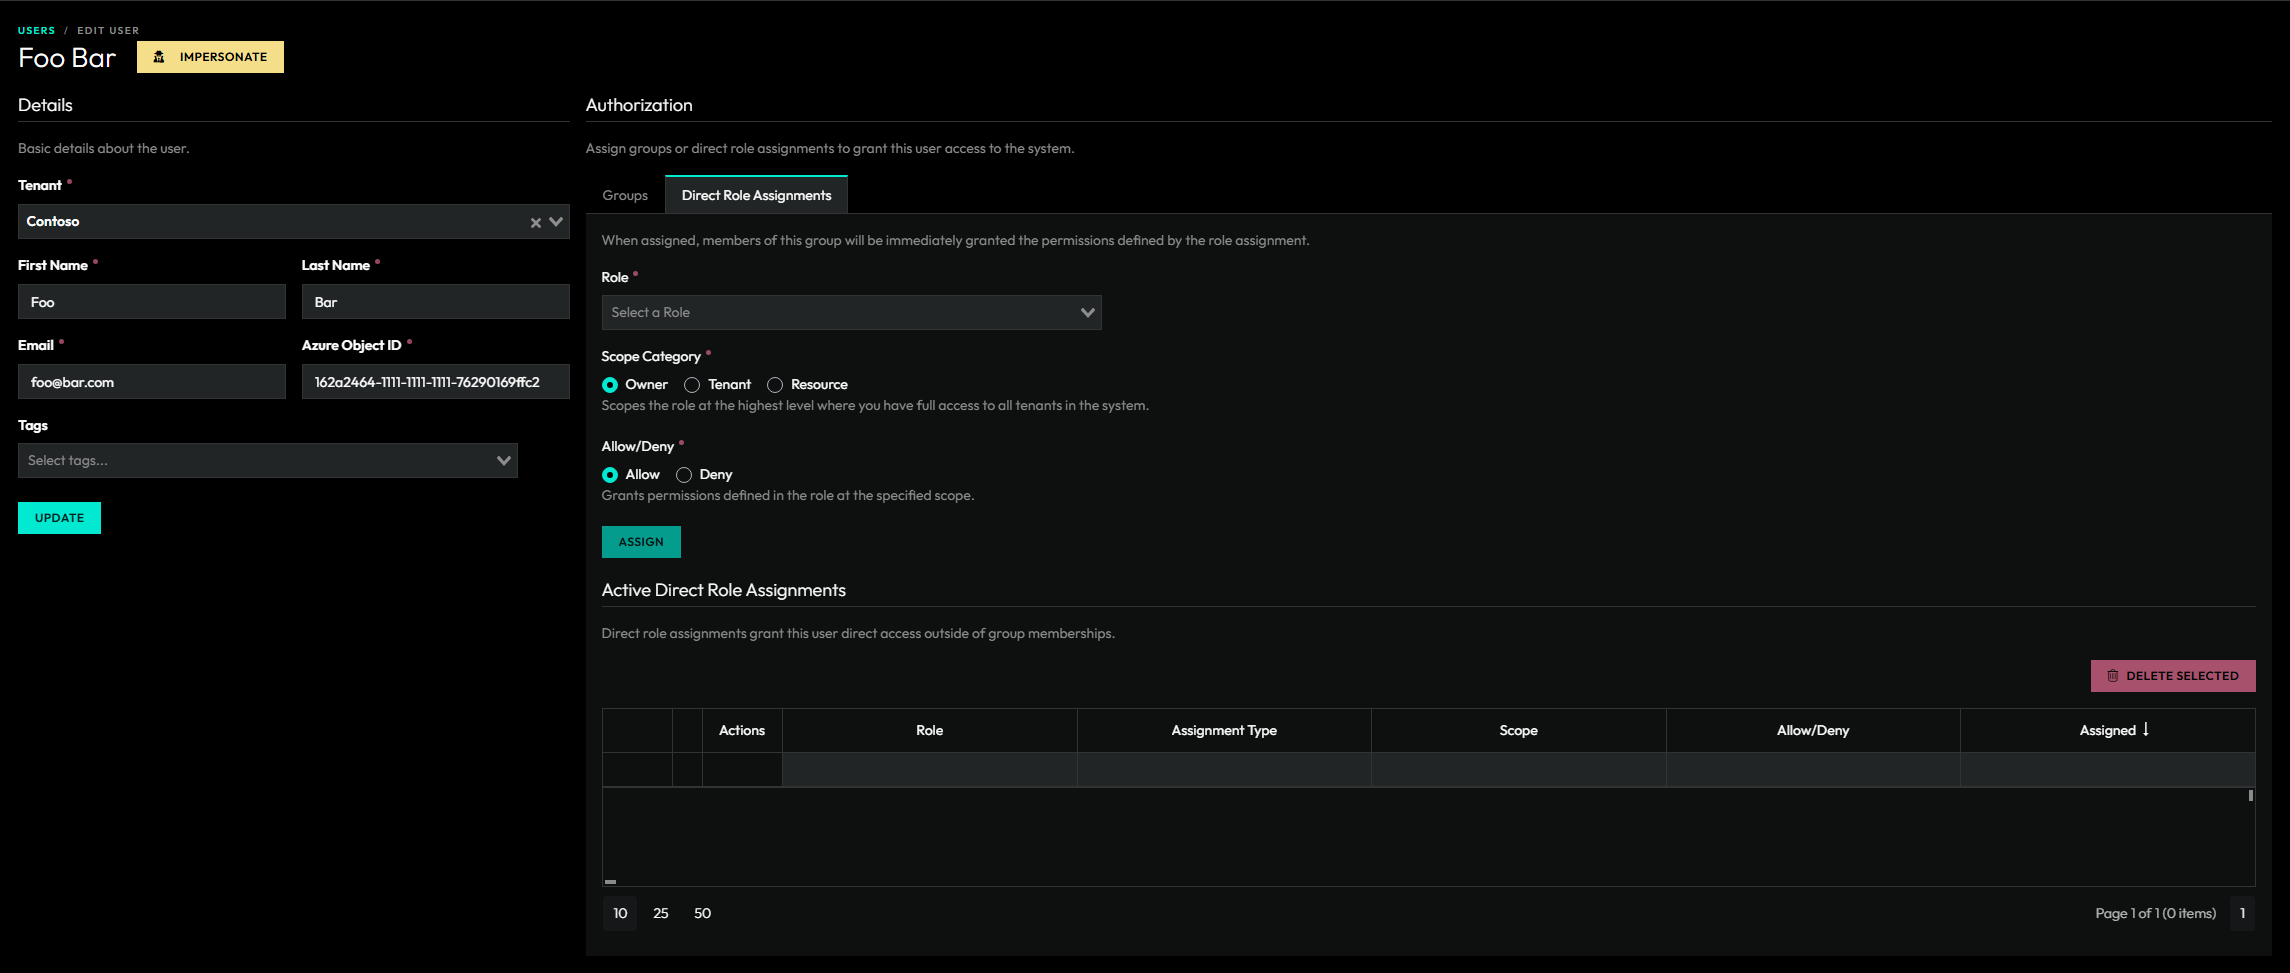
- Edit the User, and click on Direct Role Assignment.
- Assign the role “Manage Tenants, Computers and Deployments”, change the Scope Category to “Owner” and “Allow”.
- Click Assign.
- For the users who should only manage the regular tenants:
- Change the Scope Category to Tenant (the page doesn’t refresh after you assign the first role), change the Scope to MSP, and select the MSP from the drop down.
- Change Allow/Deny to Deny.
- Click Assign.
If you’re trying to prevent access to non MSP tenants, in step 2, for Scope use Tenant instead of MSP.
- Repeat step two for any other tenants you want out of scope for these users.
Testing Roles and groups
You have a couple options when it comes to testing roles and groups.
- Use a live user account to test with
- Log directly into that account in an incognito window
- Impersonate that user through ImmyBot
- Create a mock user and impersonate that
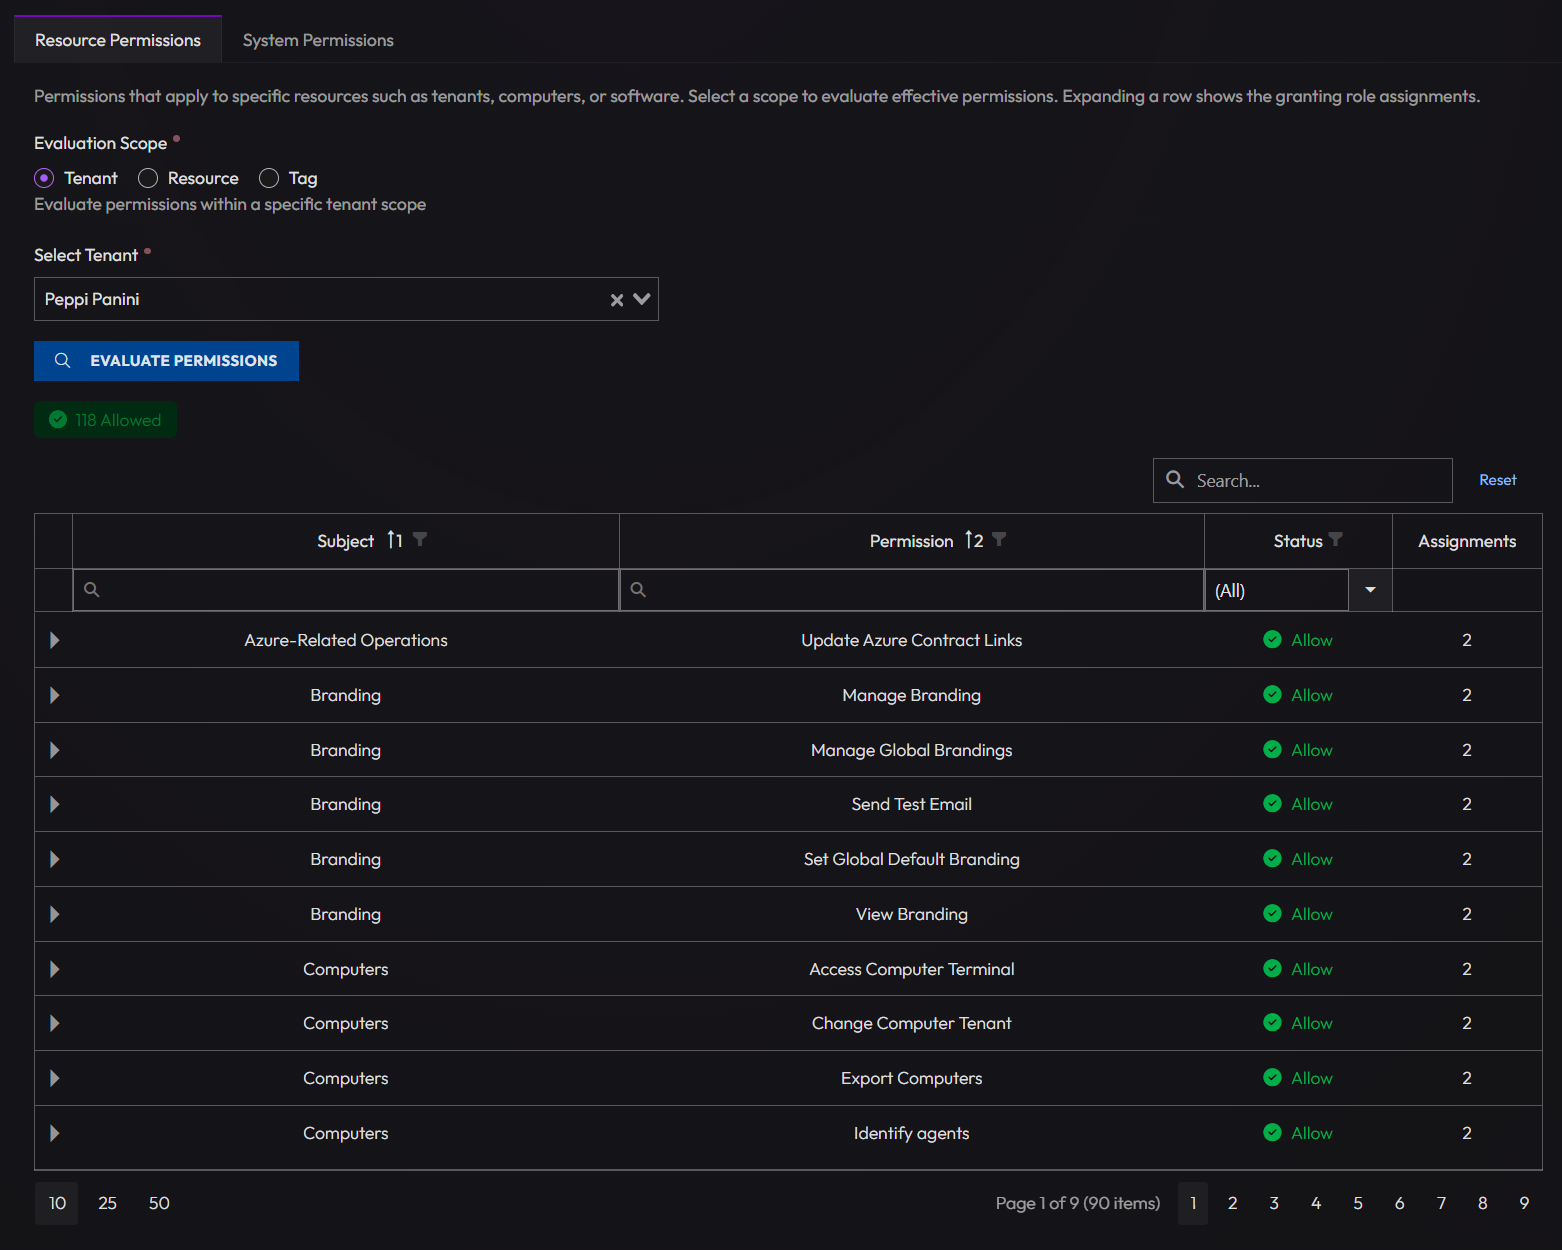
If you need to confirm if a user should have access to a specific resource or system permission, you can use the "Check Access" tab when you edit the user.
Creating a mock user
If you don’t want to test the new roles or groups on a live user, you can created mock user by following this process. You won’t be able to log into this account directly since you would be creating a mock Azure AD GUID that won’t be linked to any Azure account.
- Navigate to Show More > Users & Roles
- Click "Add New User"
- Click the tab that is labeled "Manually"
- Select the appropriate tenant you’re needing to test this role or group on
- Example if the role is intended for your MSP, select the appropriate MSP. If the role is intended for a Co-Managed IT client, select that tenant.
- Enter some first name, last name and email. It doesn’t matter what it is so long as you and your team know what the is to be used for. For the email, the domain needs to match if it’s linked to an Azure tenant.
- In the Azure Object ID, you need to put some string of characters that will pass the GUID check.
- The standard UUID v4 format (xxxxxxxx-xxxx-4xxx-yxxx-xxxxxxxxxxxx) is used by Azure Active Directory / Entra ID.
- Click Create
From here, you can assign the group or direct assign the role that you’ve created and are needing to test.
User Impersonation
You need to enable User Impersonation from Show More > Preferences > Enable: Enable User Impersonation
From here, you can navigate back to Show More > Users & Roles and click on the Impersonation button next to the user you’re wanting to impersonate. Alternatively, you could edit the user and click on the Impersonate button at the top.
List of all available permissions
All available permissions and their uses are documented in ImmyBot. They’re not listed here due to the varying permissions across different versions of ImmyBot. As we add more features, the RBAC permissions set will grow and may not apply to the version you’re on.
To view the available permissions on your instance navigate to: Show More > Users & Roles > Click on Roles > Create a new Role and scroll down to the permissions.
API Breaking Changes
The central theme of this release is the full migration from the old tenant-relationship authorization model to the new RBAC system with granular user-role-assignments.